How to record screencasts using OBS

OBS is a full-featured video recording tool. It can support multiple cameras and other advanced features. For Engineers, it is a useful tool for quickly recording a screencast to share ideas with others, demos, how-tos, etc.

The first question is what resolution should you record in? 1080p (1920x1080) seems like a good option. It looks good in small video windows, but the text is not too grainy if displayed full-screen on a UHD 4K screen. Recording 1/4 of a 4K screen naturally helps you keep the text large so it can easily be read.

So how to record 1080p? The easiest solution I’ve found is to use a 4K screen and record 1/4 of the screen which is 1080p. This gives you the other 3/4 of the screen for displaying the OBS app, notes, etc. In the below example, I stack all the apps I want to display in the screencast in the upper-left. OBS is in the bottom left, and Workflowy (which has the presentation notes) is on the right:
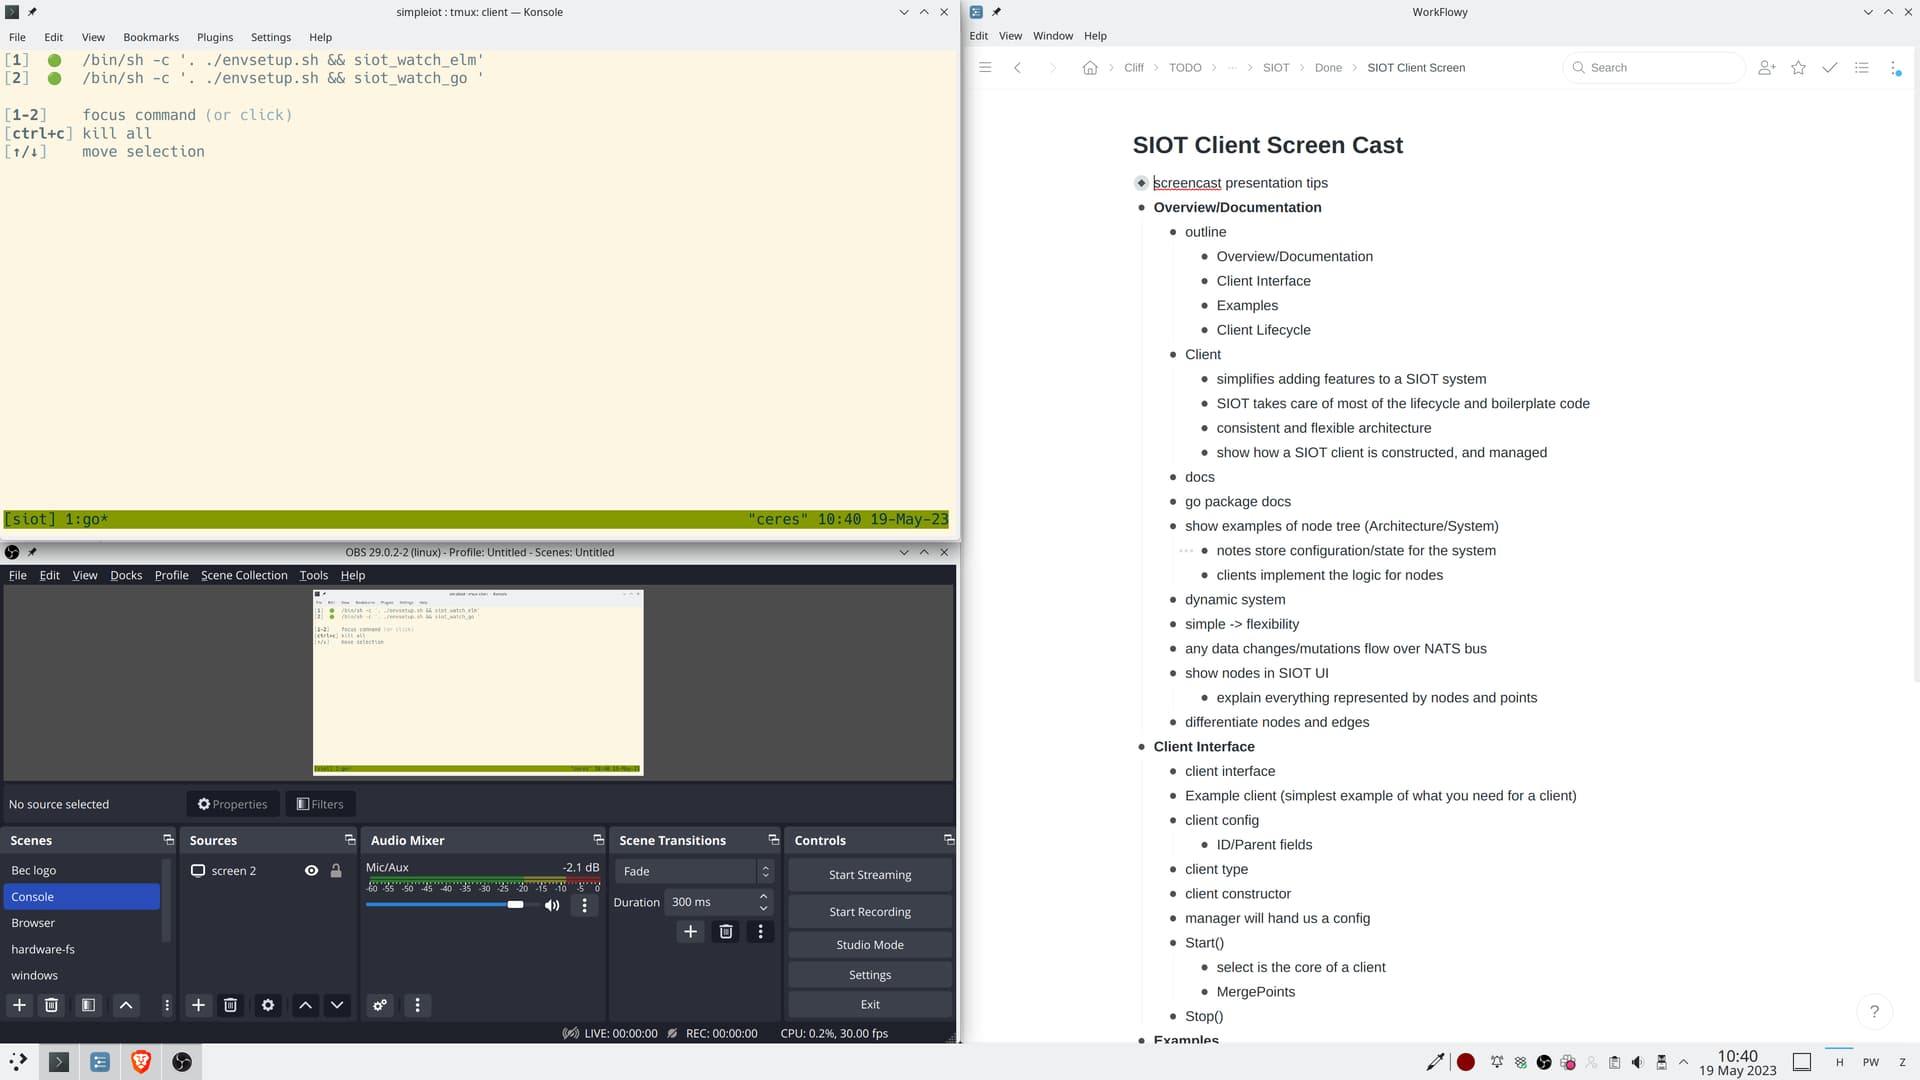
Then I simply toggle through different apps (browser, terminal, etc) that I want to display (again all stacked in the upper 1/4 of the display).

KDE is really good at quickly throwing an application into 1/4 of a screen.

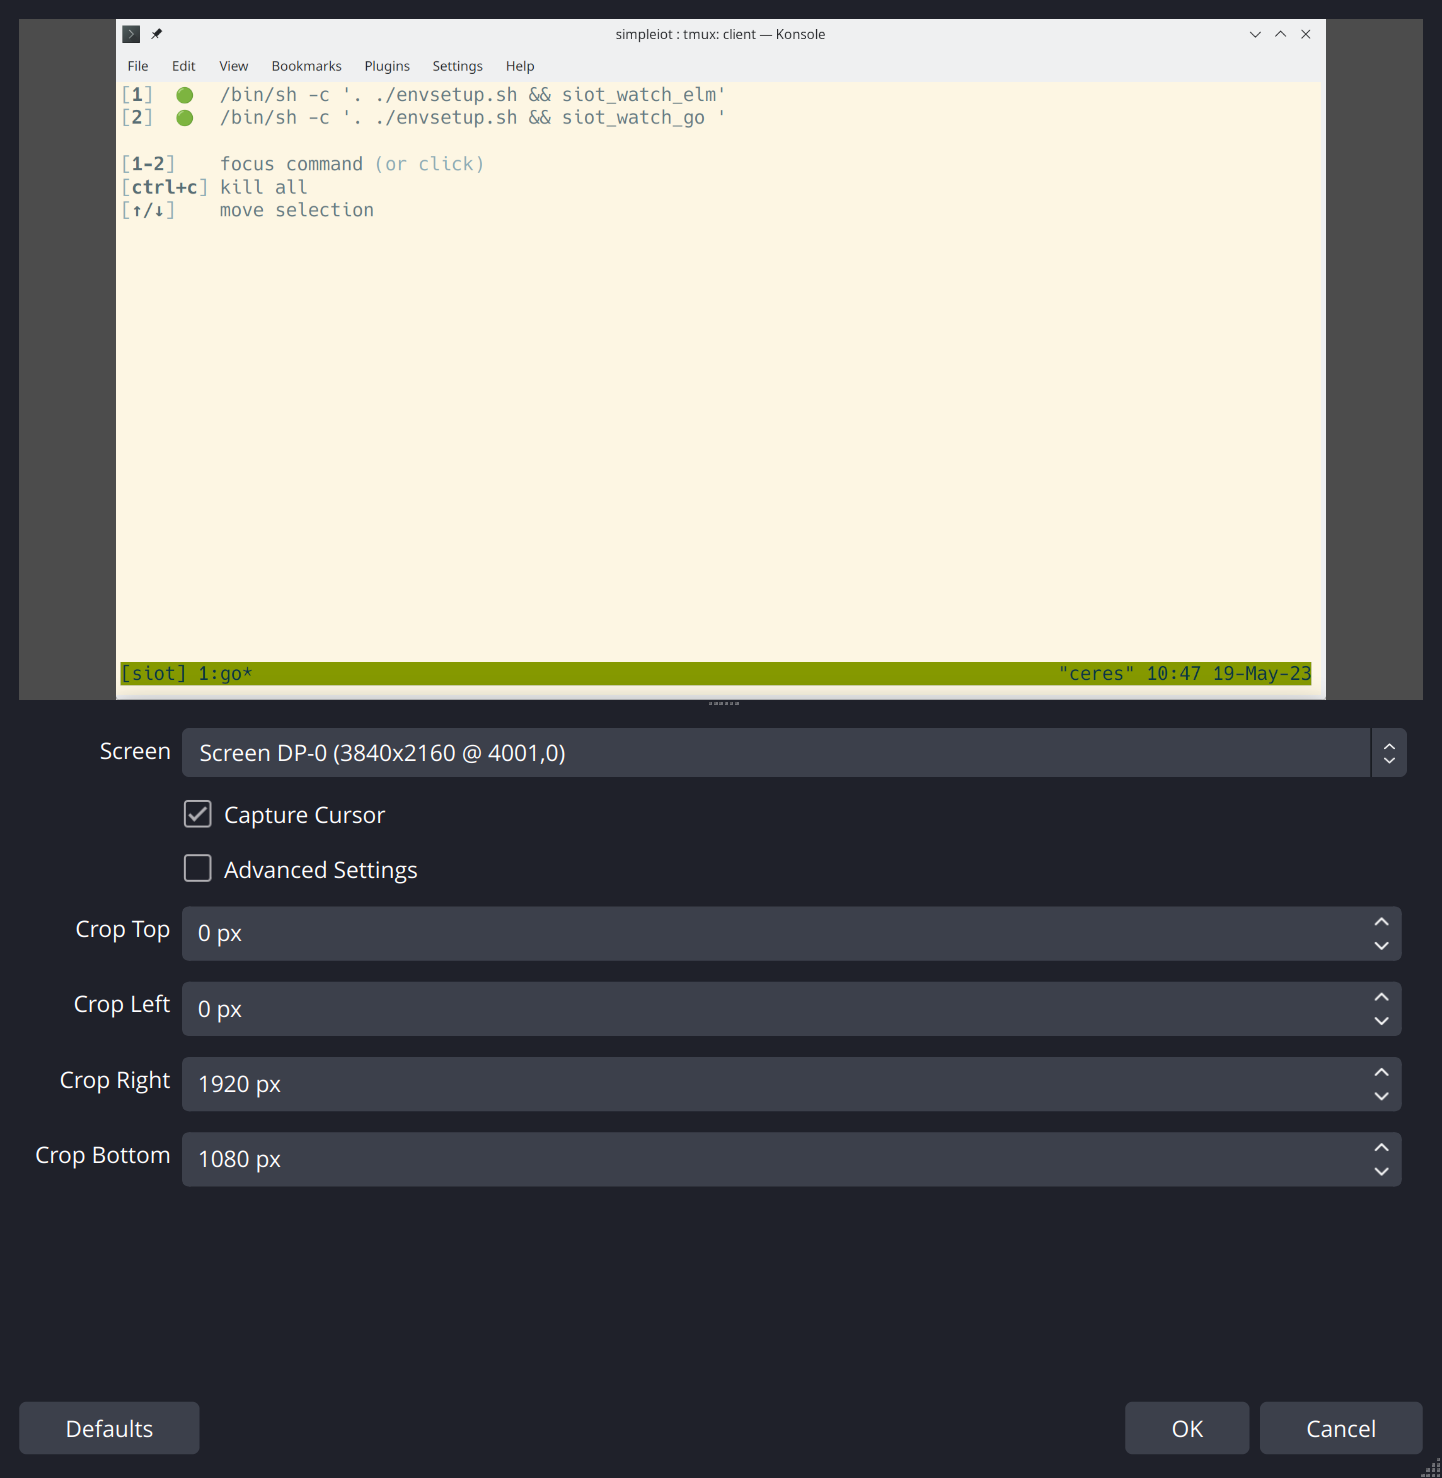
To record 1/4 of a screen in OBS, you need to capture the entire screen, and then clip it by setting the Crop Right and Crop Bottom parameters.
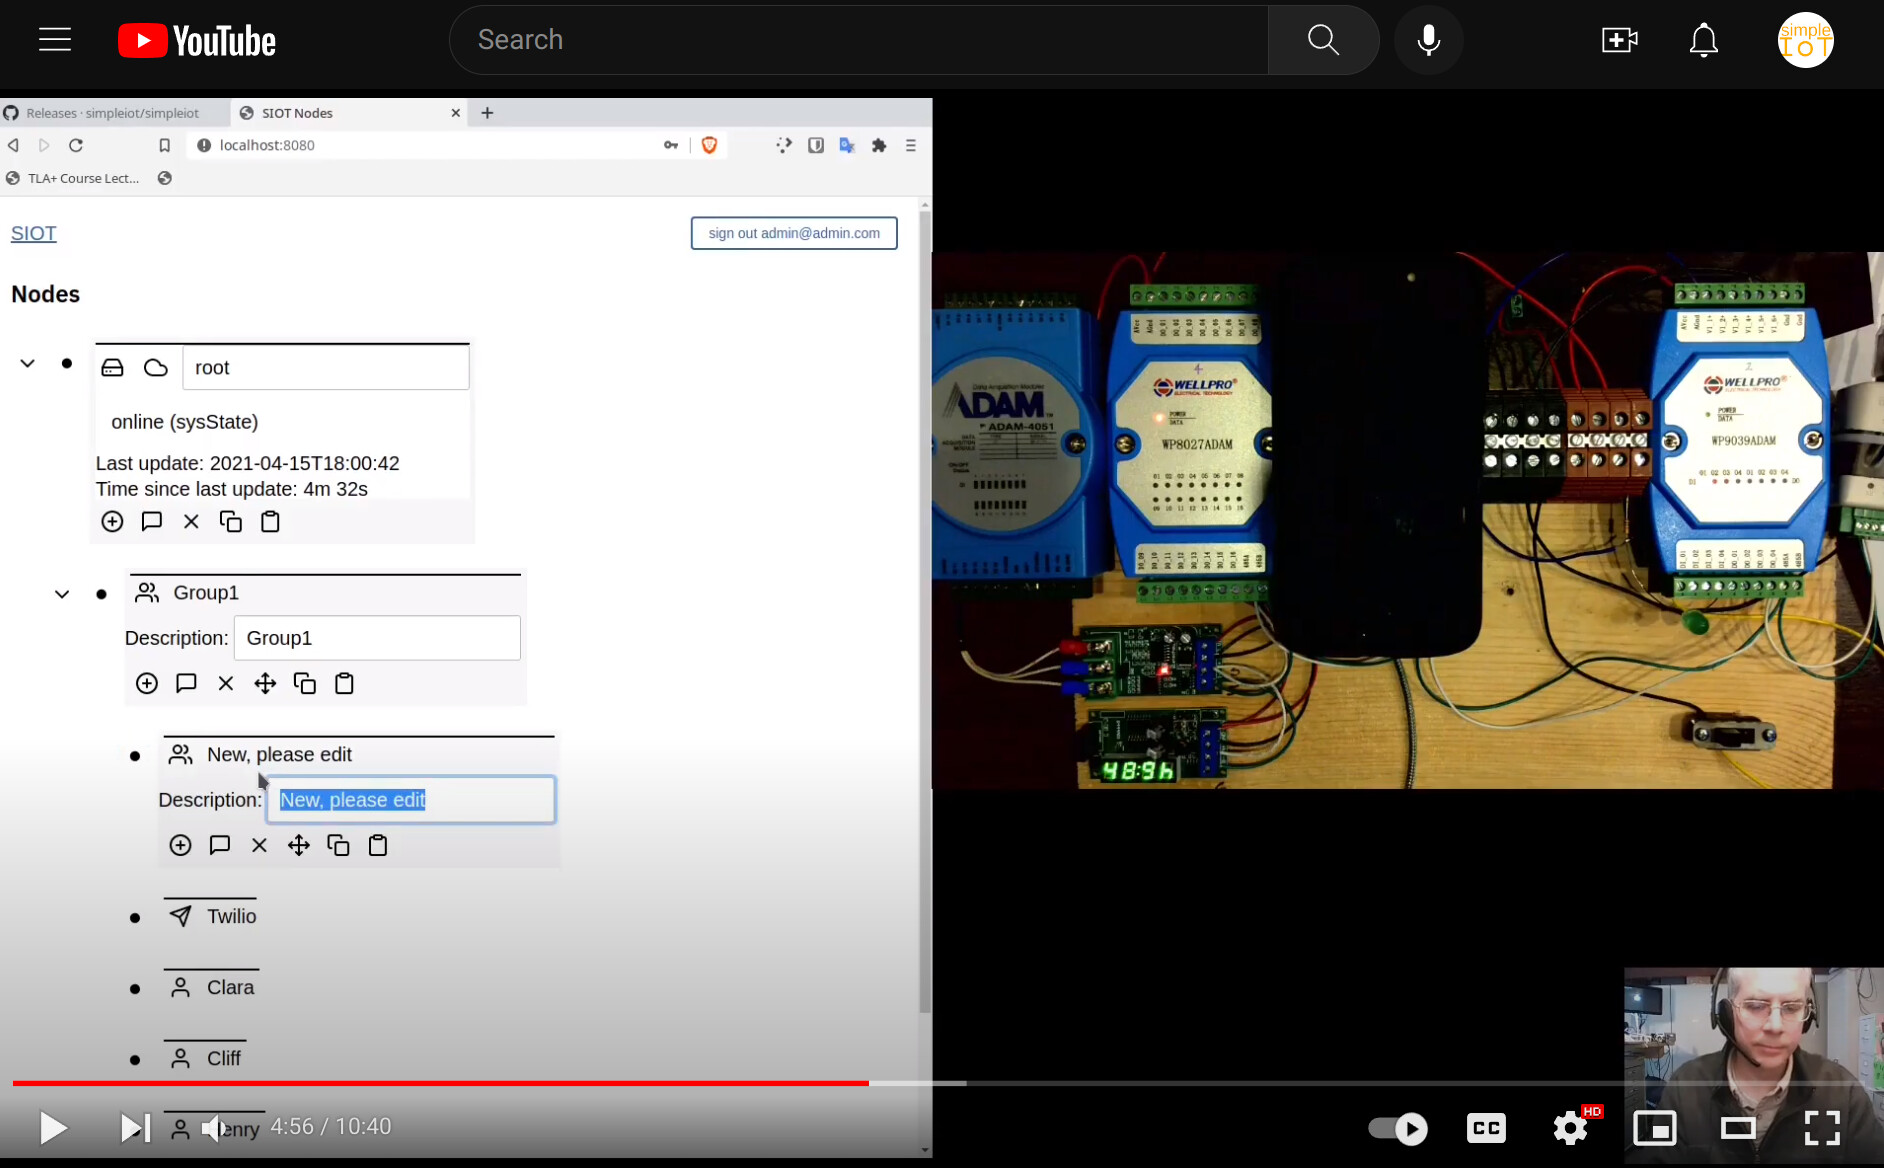
I’ve found stacking apps in one Scene simpler than creating multiple Scenes pointing to different applications. If you display application windows, applications can change between OBS sessions requiring you to tweak the scenes. However, if you capture 1/4 of a screen, that never changes. However, there are times when need to have multiple scenes – one view might include a camera on the equipment you are working on. In the below example, I’m showing two cameras plus a browser:
Lastly, get a good microphone and pick a quiet time to record.

This is just one way to record a screencast – there may be better ways. Please share if you know of any!

If you plan to share videos to be played directly in a browser, then record to mp4 format, not mkv. Mkv does not seem to play directly in a browser, although if you upload to YouTube, YT will fix it. FFMPEG can be used to easily convert mkv to mp4 (ask Chat GPT), but it’s easier if you just record in the desired format to start.

OBS Mic Filter Chain (AT2020USB)

One of my goals is to record a screencast with zero post-processing. That means the audio needs to be clear and at the right levels.

Filter Order

Noise Gate → Noise Suppression → Compressor → Limiter → Gain

Filter Settings

1. Noise Gate

Cuts audio when you’re not speaking, eliminating background noise during silence.

Setting Value
Close Threshold -50 dB
Open Threshold -35 dB
Attack Time 25 ms
Hold Time 200 ms
Release Time 150 ms

Adjust open threshold just above your room noise floor.


2. Noise Suppression

Removes continuous background noise (AC, fans, hum) even while you’re speaking.

Setting Value
Method RNNoise

If voice sounds “watery” or processed, the AC noise is too loud — try moving the mic closer or pointing the back of the mic toward the AC unit.


3. Compressor

Evens out volume differences between loud and quiet speech.

Setting Value
Ratio 4:1 to 6:1
Threshold -18 dB
Attack 6 ms
Release 60 ms
Output Gain +6 to +10 dB

4. Limiter

Prevents any peaks from clipping. The meter should never hit red.

Setting Value
Threshold -2 dB
Release 60 ms

5. Gain

Boosts overall output level to match YouTube’s -14 LUFS target.

Setting Value
Gain +6 to +10 dB

Adjust until your voice feels level-matched with other YouTube content. Most condenser mics need less gain than dynamics.


Verification Checklist

  • Meter goes silent when you stop talking (Noise Gate working)
  • Volume stays steady across loud and quiet speech (Compressor working)
  • Meter never hits red (Limiter working)
  • Overall loudness matches YouTube videos (Gain set correctly)