As a Linux user, I simply use the Git command line client. However, when working with others who run Windows, I occasionally get asked how to set up Git on Windows. Here is one way:
Install the following applications:
- https://gitforwindows.org/ (provides Git command line interface, and is needed by Tortoise Git)
- https://tortoisegit.org/ (provides UI in windows explorer – right click on directories/files to do Git operations)
All of the default options for the above applications are fine, except for the ssh agent used in Tortoise Git. Choose OpenSSH as shown below:
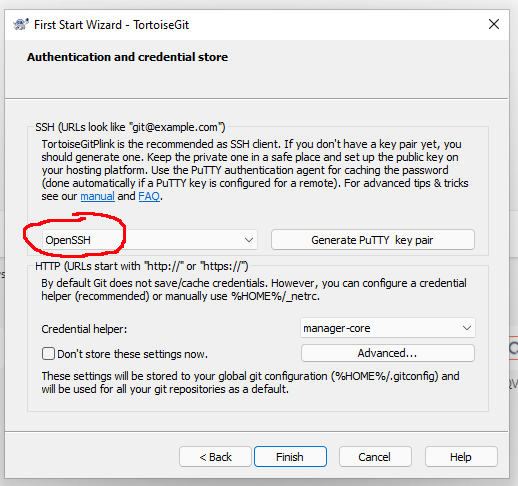
Windows SSH Authentication setup
For most Windows users, HTTPS URLs are probably simplest to get started. However, SSH authentication is sometimes needed for some Git servers.
To use SSH authentication, you need to generate a SSH keypair. Open a Git bash terminal and type: ssh-kegen. Type enter to accept all the defaults, including a blank pass-phrase. You can use a pass-phrase, but that is beyond the scope of this document.
Type:
cat /c/Users/<your user name>/.ssh/id_rsa.pub
Copy the contents of the public key to the clipboard. Open https://gitea.zonit.com/user/settings/keys, add a new ssh key, and paste the contents of your public key.
Cloning repositories in Windows
You can clone repos using the command line Git, or Tortoise Git. In a Git Bash terminal, you can clone a repo by doing someting like:
git clone git@gitea.zonit.com:Zonit-Dev/hardware.git
Make sure you use the ssh Git URL, and not the HTTPS one.
To clone using Tortoise Git, right click in Windows Explorer, select Git Clone, and enter a URI like above.
Once you clone the repository, you can now use command line Git in a Git bash terminal, or use Tortoise Git in windows explorer.
Note, this is a wiki page so anyone can edit (I think).